![]() If you want to see how to get Audacity recording desktop audio then see below. You can see download Audacity audio on here as well as how to install Audacity audio on your computer. If you are using a microphone then see how to record with Audacity as well. This is how to record audio playing on Windows which you are listening to on your computer.
If you want to see how to get Audacity recording desktop audio then see below. You can see download Audacity audio on here as well as how to install Audacity audio on your computer. If you are using a microphone then see how to record with Audacity as well. This is how to record audio playing on Windows which you are listening to on your computer.
Audacity Recording Desktop Audio
Firstly in order to record the sounds on your desktop we will first need to setup a loopback device. Secondly this is very easy to complete. You will note that when using the (default) MME device. This will be the virtual microphone called Stereo Mix. This is the most common word for it on your computer. See the graphic below which explains how this is done. Finally this will record all your desktop audio.
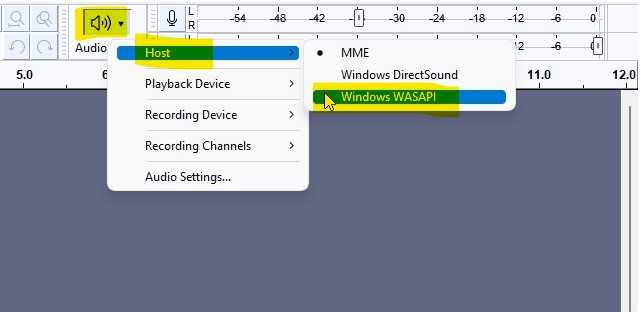
Audio > Host > Windows WASAPI
Firstly you will need to Click on the audio symbol. Then Click on Host. This is followed with a Click on WASAPI. The WASAPI is the Host. Finally you will also need to setup the (default) MME device as shown below.
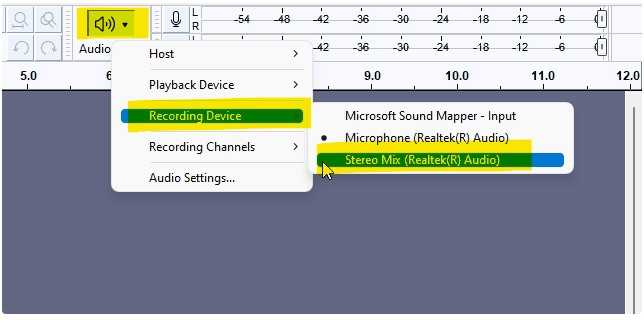
Click on the audio symbol and then on “Recording Device”. Finally Click on “Stereo Mix”. As explained before that most times this is the onboard sound from your motherboard. In most cases again this is usually a Realtek chipset. Most times this is the onboard sound.
Important: If you just want the audio and not any other audio such as the ping sound on your computer when there is a connection or error. Then you can turn this off in Audacity.
Transport > Transport Options > Software playthrough (on/off)
Turn that to OFF if you do not want any system sounds in your recording. Software Playthrough must be unchecked when recording computer playback because it will create echoes.
Simply hit the record button when you wish to start your recording. If you are using Camstudio with this then see also the article on the CamStudio lossless codec and how to setup that camera on your computer.
![]()
