![]() It is always best to use Audacity noise reduction while recording the audio than trying to correct problems later. You can see how to edit an audio file on here, but it has it limitations. This is all done inside of the Audacity audio software which is also downloadable on this website.
It is always best to use Audacity noise reduction while recording the audio than trying to correct problems later. You can see how to edit an audio file on here, but it has it limitations. This is all done inside of the Audacity audio software which is also downloadable on this website.
Audacity Noise Reduction
The most common problems are background noise as well as clicks for the mic. See how to install the mic as well as how to turn off system sounds when recording from the desktop. Prevention is always better than the cure. Note that the “constant source of noise” is where it removes a constant sound or sounds.
You will note that there are a number of ways to reduce any noise. This can be specific or based on a certain threshold. You can see below which one is best for you and you audio. Not every audio recording is the same as most times its environmental noise you are trying to remove. Open the audio file as have been shown under the article when editing Audacity audio. Much like before:
Noise Reduction
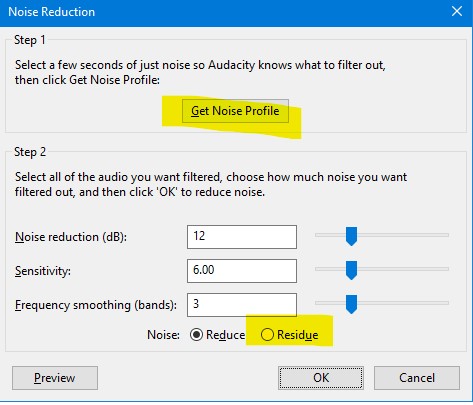
Firstly you must locate a section of your recording that you want to reduce the noise. (few seconds long at least)
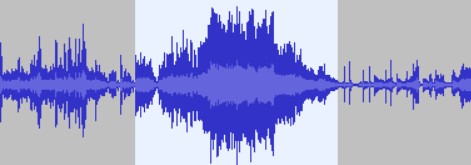
- Select the area in the waveform;
- Then go to Effects > Noise Reduction and Click the “Get noise profile” button;
- Now select the audio for which you want to reduce the noise.
- Then go to Effects > Noise Reduction again. You will need to play around with this;
- You can also use the “Residue” switch to hear which sound the software will be remove;
- Then once you are satisfied, then click on OK to apply it to the selected audio;
- Note that if you used the “Residue” switch before then ensure that you switch it back, before pressing OK.
Noise reduction is not bad as it will search for specific noise. It is the best compare to the next one which is Noise Gate that removed certain sounds at a low threshold. The next one is a bit of a blunt knife if used incorrectly as it will remove all and not specific sounds under a certain threshold.
Audacity Noise Gate
As explained that the Noise Gate effect will remove any sound quieter than a certain threshold. This is different when compared to Noise Reduction. You will need to decide what works best for you. System sounds like soft hum sounds you can remove with Noise Gate as you will simply remove the lower level sounds.
When you have a crackling microphone from time to time. Then the Noise Reduction would be more appropriate and effective and you can target that specific sound and area in the audio waveform.
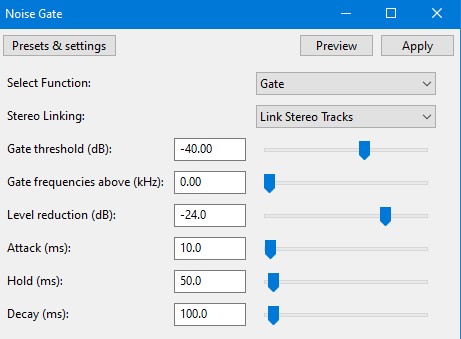
See the “Gate Threshold” as well as the “Gate Frequency”. You will need to play around with the settings until you get the audio that you are wanting. You will also note at the top left it shows “Select Function” and “Gate” at the top right.
Much like before you will need to select a part of the audio that has only background noise.
- First go to Effects > Noise Gate;
- Then Click Select Function: Analyse Noise Level
- Now Click on OK. (Audacity will recommended a threshold);
- Select the audio you want to apply the effect to.
- Go back into Effects > Noise Gate (Set it back to Select Function: Gate, Then enter the threshold level you had above);
- Play around with the parameters to test the result;
- Click on OK to apply the levels of the noise gate.
What is the difference then between the noise gate and noise reduction? So in reality the noise gate will target background noise when there is no other sound. It will then target that threshold of the background noise. The noise reduction targets noise patterns happening when the preferred audio is playing.
![]()

